How to make File instance from image URL in React
RECOMMEND POSTS BEFORE THIS
0. 들어가면서
서버로부터 받은 이미지를 리액트(react) 상태(state)로 관리하기 위해 File 인스턴스로 만들 필요가 있었습니다. 이미지 URL 정보만 있었기 때문에 이를 사용해 File 인스턴스를 생성하는 방법과 테스트 방법에 대해 정리하였습니다.
1. Fetch API
브라우저 웹 API 중 하나인 fetch 함수를 사용하면 다운받은 이미지를 블랍(Binary Large OBject, BLOB) 인스턴스로 변형할 수 있습니다. 블랍 인스턴스만 있다면 이를 기반으로 File 인스턴스를 쉽게 생성할 수 있기 때문에 이를 사용했습니다. fetch 함수 응답 바디(response body) 인스턴스는 다음과 같은 모습으로 구성되어 있습니다. blob 함수를 통해 응답 메시지에 담긴 데이터를 블랍 인스턴스로 변경할 수 있습니다.
interface Body {
    readonly body: ReadableStream<Uint8Array> | null;
    readonly bodyUsed: boolean;
    arrayBuffer(): Promise<ArrayBuffer>;
    blob(): Promise<Blob>;
    formData(): Promise<FormData>;
    json(): Promise<any>;
    text(): Promise<string>;
}
구현체 코드는 다음과 같이 작성합니다.
fetch(url)
  .then((response) => response.blob())
  .then((blob) => {
    const image = new File([blob], "image", { type: blob.type });
    setFile(image);
  })
2. How to make test code?
fetch 함수를 사용하면 테스트가 어렵습니다. 비트(Vite)로 생성한 프로젝트의 테스트 환경에서 fetch 함수를 직접 호출하면 다음과 같은 에러 메시지를 만납니다.
- 웹 API fetch 함수를 찾을 수 없습니다.
fetch is not defined
ReferenceError: fetch is not defined
    at abrupt (/Users/junhyunk/Desktop/action-in-blog/src/utils/image.ts:5:44)
    at tryCatch (/Users/junhyunk/Desktop/action-in-blog/node_modules/@babel/runtime/helpers/regeneratorRuntime.js:45:16)
    at Generator.<anonymous> (/Users/junhyunk/Desktop/action-in-blog/node_modules/@babel/runtime/helpers/regeneratorRuntime.js:133:17)
    ...
CRA(Create React App)로 생성한 프로젝트의 테스트 환경에서 fetch 함수를 직접 호출하면 다음과 같은 에러 메시지를 만납니다.
- CRA로 만든 프로젝트는 fetch 함수를 실제로 호출합니다.
- 개발 환경에서 일반적으로 프록시(proxy)를 구성하기 실제 API 호출을 수행하면 에러가 발생합니다.
Network request failed
TypeError: Network request failed
    at /Users/junhyunk/Desktop/action-in-blog/node_modules/whatwg-fetch/dist/fetch.umd.js:566:18
    at Timeout.task [as _onTimeout] (/Users/junhyunk/Desktop/action-in-blog/node_modules/jsdom/lib/jsdom/browser/Window.js:516:19)
    at listOnTimeout (node:internal/timers:569:17)
    at processTimers (node:internal/timers:512:7)
...
fetch 함수는 기본적으로 제공되는 웹 API이기 때문에 기능 자체를 테스트 할 필요는 없습니다. 응답 바디 인스턴스의 blob 함수를 테스트하는 것도 물론 비합리적입니다. 이미지를 로드(load)하고 블랍 인스턴스를 만드는 일련의 과정을 함수로 정의하고 모듈로써 이를 호출하도록 구성한다면 테스트를 쉽게 작성할 수 있습니다.
2.1. image.ts
이미지를 로드하고 블랍 인스턴스를 만드는 작업을 별도 함수로 정의합니다. 웹 API 기능을 나열한 것이기 때문에 이 모듈을 위한 테스트 코드는 작성하지 않습니다.
export const loadImage = (url: string): Promise<Blob> => {
  return fetch(url).then((response) => response.blob());
};
2.2. App.tsx
구현체 코드는 다음과 같이 구현합니다.
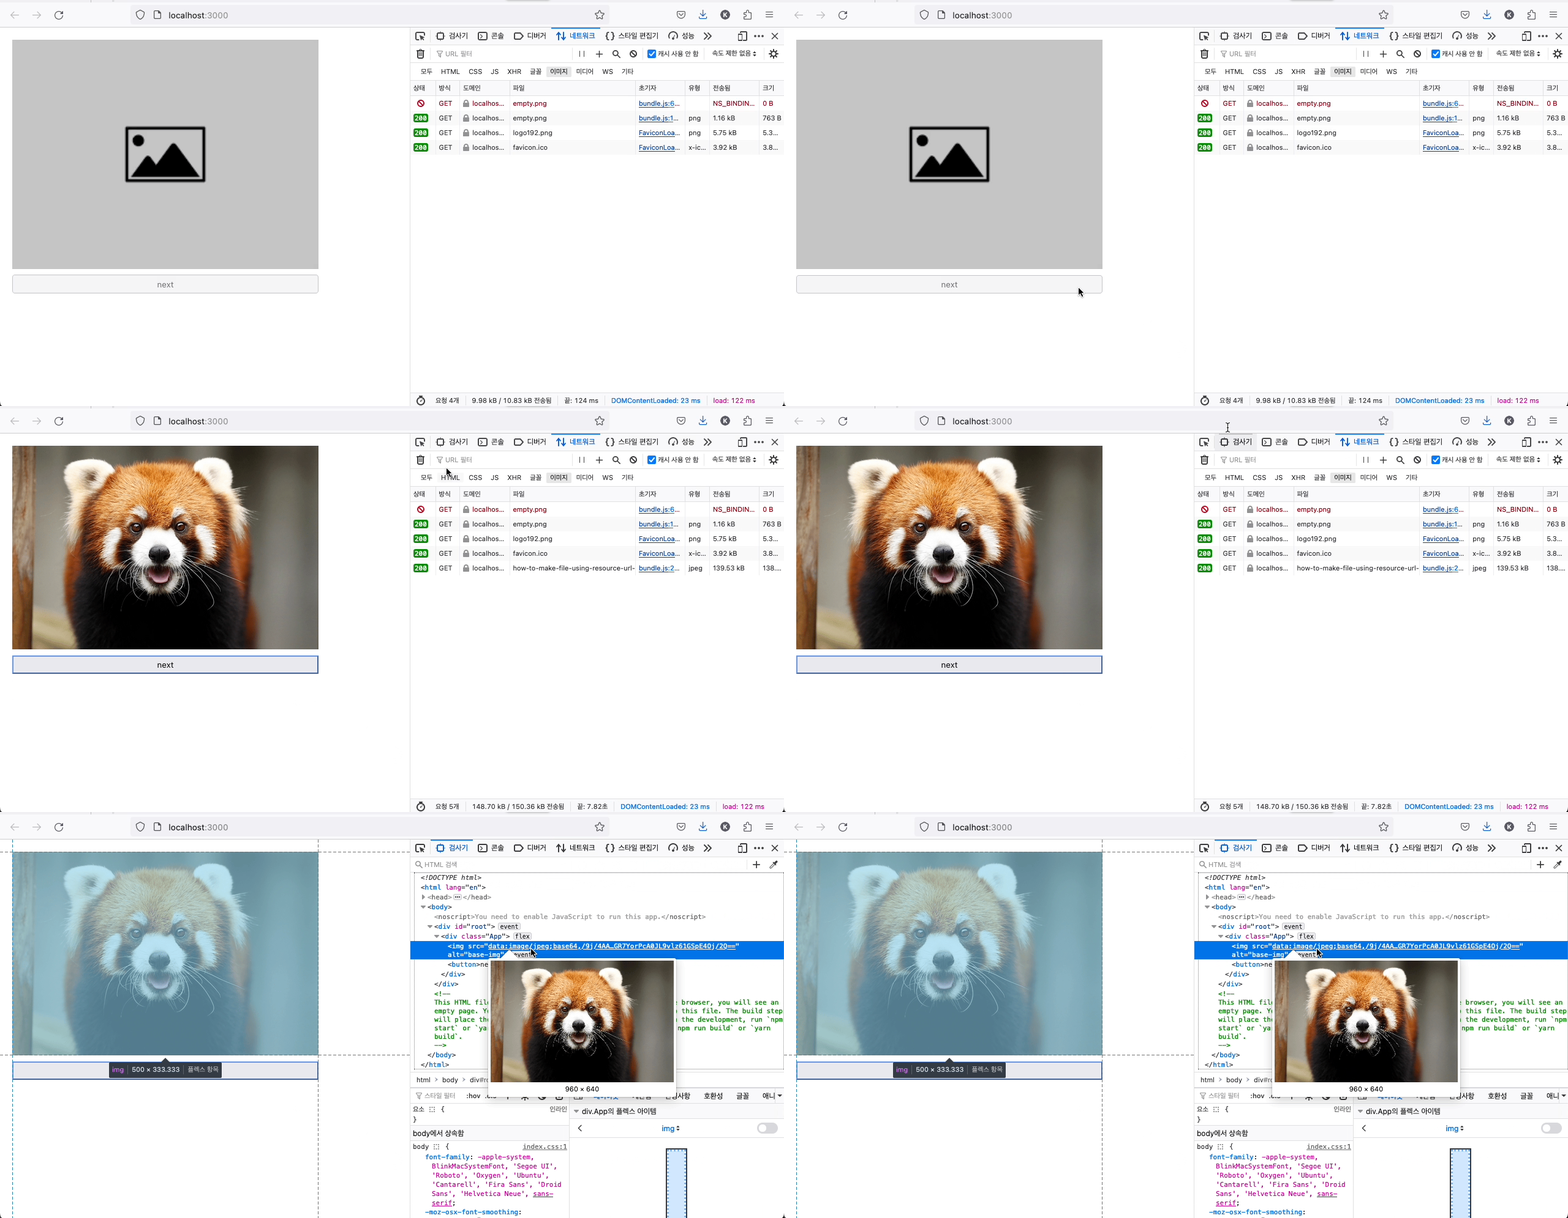
img태그를 눌러 필요한 이미지를 서버로부터 로딩합니다.- 이미지 로드가 완료되면 블랍 인스턴스를 기반으로 File 인스턴스를 생성합니다.
- 생성한 File 인스턴스는 스테이트에 저장합니다.
- file 스테이트가 존재하는 경우 next 버튼이 활성화됩니다.
import React, { useRef, useState } from "react";
import "./App.css";
import { loadImage } from "./utils/image";

function App() {
  const [file, setFile] = useState<File>();
  const imageRef = useRef<HTMLImageElement>(null);

  const readImage = (image: File) => {
    const fileReader = new FileReader();
    fileReader.onloadend = function () {
      if (imageRef.current && fileReader.result) {
        imageRef.current.src = fileReader.result.toString();
      }
    };
    fileReader.readAsDataURL(image);
  };

  const load = () => {
    loadImage(
      "/images/how-to-make-file-using-resource-url-in-react-1.JPG",
    ).then((blob) => {
      const image = new File([blob], "image", { type: blob.type });
      setFile(image);
      readImage(image);
    });
  };

  return (
    <div className="App">
      <img
        src="/images/empty.png"
        alt="base-img"
        ref={imageRef}
        onClick={load}
      />
      <button disabled={file === undefined}>next</button>
    </div>
  );
}

export default App;
2.3. App.test.tsx
간단한 테스트 코드로 몇 가지 비즈니스 기능을 검증합니다. 테스트 코드는 정상적으로 통과합니다.
- 빈 이미지를 눌러 서버로부터 새로운 이미지를 로드합니다.
- 이미지 로드가 완료되면 next 버튼이 활성화됩니다.
- 이미지 로드가 완료되면 빈 이미지가 새로 다운로드 받은 이미지로 대체됩니다.
import React from "react";
import userEvent from "@testing-library/user-event";
import { render, screen, waitFor } from "@testing-library/react";

import * as imageUtil from "./utils/image";

import App from "./App";

test("when click image then image loaded and next button enabled", async () => {
  jest
    .spyOn(imageUtil, "loadImage")
    .mockResolvedValue(new Blob(["image-binary"], { type: "image/jpeg" }));
  render(<App />);
  const baseImage = screen.getByAltText("base-img");

  userEvent.click(baseImage);

  await waitFor(() => {
    expect(baseImage).toHaveAttribute(
      "src",
      `data:image/jpeg;base64,${btoa("image-binary")}`,
    );
    expect(screen.getByRole("button", { name: "next" })).toBeEnabled();
  });
});
3. Result
실제 구현체 코드를 실행하면 다음과 같이 동작합니다.


댓글남기기