


스프링 DTO(Data Transfer Object) 객체와 파일 업로드
RECOMMEND POSTS BEFORE THIS
0. 들어가면서
Jekyll 문법과 충돌하므로 { { someValue } }으로 표기된 코드는 공백을 제거해야 정상적으로 동작한다.
1. 추가 기능 요건 사항
어제 함께 일하는 동료가 특정 기능 구현에 대한 도움을 요청했는데, 구현하다 보니 블로그 글 주제로 좋을 것 같아서 정리했다. 스프링 MultipartFile 인터페이스와 파일 업로드 글의 예제 코드는 단순하게 이미지를 선택해서 업로드하는 기능이었다. 너무 단순한 기능이어서 필요로 하는 기능엔 적용할 수 없었다. 새롭게 추가해야 하는 기능의 요건 사항을 간략히 요약하면 다음과 같다.
- N건의 item 업데이트가 필요하다.
- item별로 이미지가 M개 매칭되는데 함께 업로드되어야 한다.
- item 데이터와 함께 업로드된 이미지는 item 데이터 PK에 매칭되어 저장되어야 한다.
DTO 클래스에 MultipartFile 리스트를 담고 싶었는데, 관련된 내용을 찾아보니 @ModelAttribute 애너테이션이 눈에 띄었다. 이번 기능을 구현하면서 몇 가지 추가적인 내용을 확인했는데, 관련 내용은 아래 예제 코드를 통해 설명하겠다. 먼저 @ModelAttribute 애너테이션에 대해 알아보겠다.
2. @ModelAttribute 애너테이션
Spring Framework Doc
Annotation that binds a method parameter or method return value to a named model attribute, exposed to a web view. Supported for controller classes with @RequestMapping methods.
@RequestMapping 애너테이션이 붙은 메서드를 가진 컨트롤러(controller) 클래스에서 사용할 수 있으며, 요청 파라미터나 반환 값을 명명된 모델 속성(model attribute)에 바인딩한다고 한다. 설명만 봐서는 감이 오지 않으니 관련된 예제 코드를 확인해보자.
참고한 글의 세 번째 예시를 보면 폼(Form) 정보를 특정 클래스에 매칭시키는 기능을 제공하는 것처럼 보인다. 해당 예제 코드를 가져와서 살펴보자. 뷰 코드는 다음과 같다. 간단한 폼을 작성한다.
<form:form method="POST" action="/spring-mvc-basics/addEmployee" modelAttribute="employee">
    <form:label path="name">Name</form:label>
    <form:input path="name" />
    <form:label path="id">Id</form:label>
    <form:input path="id" />
    <input type="submit" value="Submit" />
</form:form>
페이지를 반환하는 역할을 수행하는 EmployeeController 클래스를 만든다. 위 폼을 제출(submit)하면 폼 내부에 라벨과 매칭된 값들이 employee 객체에 매핑되어 전달된다. 이때 @ModelAttribute 애너테이션을 사용한다.
@Controller
@ControllerAdvice
public class EmployeeController {

    private Map<Long, Employee> employeeMap = new HashMap<>();

    @RequestMapping(value = "/addEmployee", method = RequestMethod.POST)
    public String submit(@ModelAttribute("employee") Employee employee,
      BindingResult result, ModelMap model) {
        if (result.hasErrors()) {
            return "error";
        }
        model.addAttribute("name", employee.getName());
        model.addAttribute("id", employee.getId());
        employeeMap.put(employee.getId(), employee);
        return "employeeView";
    }
    // ...
}
3. 단일 MultipartFile 멤버 DTO 예제 코드
위 예제를 활용하여 Vue.js, 스프링 부트(spring boot) 환경에서도 동일하게 동작하도록 구현해보자. DTO 클래스 안에 MultipartFile 객체를 1개 담아서 전달하는 예제 코드를 살펴보자. FileUpload.vue 파일은 프론트엔드 프로젝트, 나머지 클래스 파일들은 백엔드 프로젝트의 예제 코드이다. 먼저 FileUpload.vue 파일을 살펴보자.
- 파일을 선택할 수 있는 input element를 생성한다.
- 한 개의 파일만 선택할 수 있도록 multiple 속성을 false 값으로 지정한다.
- 파일 선택 후 수행되는
onchange이벤트에서 API 요청을 수행한다. - axios 요청 시 전달하는
FormData객체에'file'이라는 이름으로 선택한 이미지를 담는다. FormData객체를 API 요청에 함께 전달한다.
<template>
    <div>
        <h3>파일 업로드 결과: { { this.response === '' ? 'waiting' : this.response } }</h3>
        <div>
            <button @click="uploadFileInDto()">Multipart in DTO Upload</button>
            <button @click="uploadFileListInDto()">Images List in DTO Upload</button>
            <button @click="uploadFileMapInDto()">Images Map in DTO Upload</button>
            <button @click="uploadFileMapListInDto()">Images Map-List in DTO Upload</button>
        </div>
    </div>
</template>

<script>
import axios from 'axios';

export default {
    name: 'FileUpload',
    data() {
        return {
            response: ''
        }
    },
    methods: {
        responseCallback(response) {
            this.response = response.data;
        },
        errorCallback(error) {
            this.response = error.message;
        },
        getImageSelectElement(multiple) {
            let elem = document.createElement('input');
            elem.id = 'image';
            elem.type = 'file';
            elem.accept = 'image/*';
            elem.multiple = multiple;
            return elem;
        },
        uploadFileInDto() {
            var context = this;
            let elem = this.getImageSelectElement(false);
            elem.click();
            elem.onchange = function() {
                const formData = new FormData();
                formData.append('file', this.files[0]);
                axios.post('http://localhost:8081/dto', formData, { headers: { 'Content-Type': 'multipart/form-data' } }).then(context.responseCallback).catch(context.errorCallback);
            }
        },

        // ...

    }
}
</script>
다음 MultipartDto 클래스 코드를 살펴보자. DTO 클래스는 'file'이라는 이름을 가진 MultipartFile 멤버를 가진다.
package blog.in.action.dto;

import lombok.Getter;
import lombok.NoArgsConstructor;
import lombok.Setter;
import org.springframework.web.multipart.MultipartFile;

@Getter
@Setter
@NoArgsConstructor
public class MultipartDto {

    private MultipartFile file;
}
다음 FileController 클래스를 살펴보자. /dto 경로에 대한 요청을 받아주는 메서드의 파라미터로 위에서 정의한 MultipartDto 객체를 받는다.
package blog.in.action.controller;

import blog.in.action.dto.MultipartDto;
import blog.in.action.dto.MultipartListDto;
import blog.in.action.dto.MultipartMapDto;
import blog.in.action.dto.MultipartMapListDto;
import java.io.FileOutputStream;
import java.util.List;
import java.util.Map;
import org.springframework.web.bind.annotation.CrossOrigin;
import org.springframework.web.bind.annotation.ModelAttribute;
import org.springframework.web.bind.annotation.PostMapping;
import org.springframework.web.bind.annotation.ResponseBody;
import org.springframework.web.bind.annotation.RestController;
import org.springframework.web.multipart.MultipartFile;

@CrossOrigin("*")
@RestController
public class FileController {

    @PostMapping(value = "/dto")
    public @ResponseBody
    String uploadFileInDto(@ModelAttribute MultipartDto dto) {
        MultipartFile multipartFile = dto.getFile();
        try (FileOutputStream writer = new FileOutputStream("./images/" + multipartFile.getOriginalFilename())) {
            writer.write(multipartFile.getBytes());
        } catch (Exception e) {
            return "upload fail";
        }
        return "upload success";
    }

    // ...

}
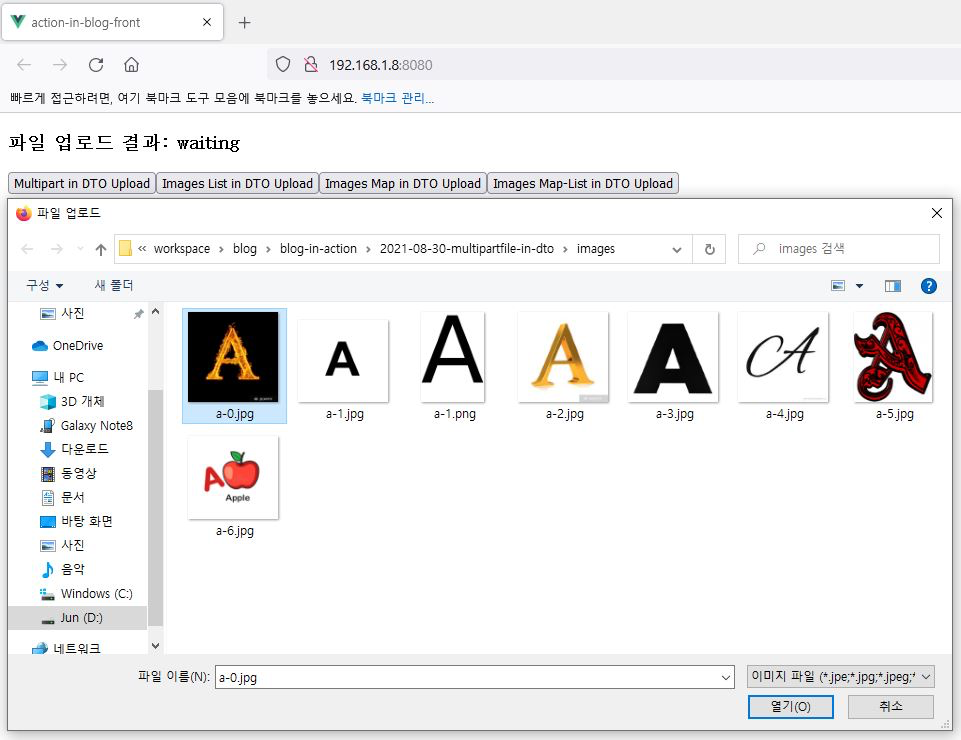
실제로 파일 업로드가 잘 동작하는지 확인해보자. Multipart in DTO Upload 버튼을 누른 후 이미지를 선택한다.
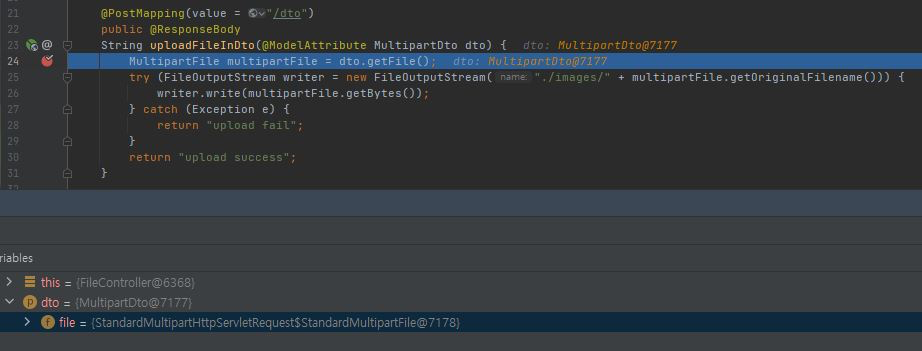
백엔드 FileController 객체의 uploadFileInDto 메서드에 브레이킹 포인트를 만들어 메모리 상태를 살펴보자. 엔드포인트 파라미터인 MultipartDto 객체의 file 멤버 변수에 프론트엔드에서 전달한 파일 정보가 담겨 있는 것을 볼 수 있다.
4. MultipartFile 리스트 DTO 예제 코드
DTO 클래스 안에 N개의 파일을 리스트(List)로 담아서 전달하는 예제 코드이다. FileUpload.vue 파일은 프론트엔드 프로젝트, 나머지 클래스 파일들은 백엔드 프로젝트의 예제 코드이다. 먼저 FileUpload.vue 코드를 살펴보자.
- 파일을 선택할 수 있는 input element를 생성한다.
- 파일을 여러 개 선택할 수 있도록 multiple 속성을 true 값으로 지정한다.
- 파일 선택 후 수행되는
onchange이벤트에서 API 요청을 수행한다. - axios 요청 시 전달하는
FormData객체에'files'라는 이름으로 선택한 이미지를 추가(append)하여 담는다. FormData객체를 API 요청에 함께 전달한다.
<template>
    <div>
        <h3>파일 업로드 결과: { { this.response === '' ? 'waiting' : this.response } }</h3>
        <div>
            <button @click="uploadFileInDto()">Multipart in DTO Upload</button>
            <button @click="uploadFileListInDto()">Images List in DTO Upload</button>
            <button @click="uploadFileMapInDto()">Images Map in DTO Upload</button>
            <button @click="uploadFileMapListInDto()">Images Map-List in DTO Upload</button>
        </div>
    </div>
</template>

<script>
import axios from 'axios';

export default {
    name: 'FileUpload',
    data() {
        return {
            response: ''
        }
    },
    methods: {
        responseCallback(response) {
            this.response = response.data;
        },
        errorCallback(error) {
            this.response = error.message;
        },
        getImageSelectElement(multiple) {
            let elem = document.createElement('input');
            elem.id = 'image';
            elem.type = 'file';
            elem.accept = 'image/*';
            elem.multiple = multiple;
            return elem;
        },
        uploadFileListInDto() {
            var context = this;
            let elem = this.getImageSelectElement(true);
            elem.click();
            elem.onchange = function() {
                const formData = new FormData();
                for (var index = 0; index < this.files.length; index++) {
                    formData.append('files', this.files[index]);
                }
                axios.post('http://localhost:8081/dto/multipart/list', formData, { headers: { 'Content-Type': 'multipart/form-data' } }).then(context.responseCallback).catch(context.errorCallback);
            }
        },

        // ...

    }
}
</script>
MultipartListDto 클래스의 모습은 아래와 같다. files라는 리스트 타입의 멤버 변수를 갖고 있다.
package blog.in.action.dto;

import java.util.List;
import lombok.Getter;
import lombok.NoArgsConstructor;
import lombok.Setter;
import org.springframework.web.multipart.MultipartFile;

@Getter
@Setter
@NoArgsConstructor
public class MultipartListDto {

    private List<MultipartFile> files;
}
FileController 클래스를 살펴보자. /dto/multipart/list 경로에 대한 요청을 받아주는 메서드의 파라미터로 MultipartListDto 객체를 받는다.
package blog.in.action.controller;

import blog.in.action.dto.MultipartDto;
import blog.in.action.dto.MultipartListDto;
import blog.in.action.dto.MultipartMapDto;
import blog.in.action.dto.MultipartMapListDto;
import java.io.FileOutputStream;
import java.util.List;
import java.util.Map;
import org.springframework.web.bind.annotation.CrossOrigin;
import org.springframework.web.bind.annotation.ModelAttribute;
import org.springframework.web.bind.annotation.PostMapping;
import org.springframework.web.bind.annotation.ResponseBody;
import org.springframework.web.bind.annotation.RestController;
import org.springframework.web.multipart.MultipartFile;

@CrossOrigin("*")
@RestController
public class FileController {

    @PostMapping(value = "/dto/multipart/list")
    public @ResponseBody
    String uploadFileListInDto(@ModelAttribute MultipartListDto dto) {
        for (MultipartFile multipartFile : dto.getFiles()) {
            try (FileOutputStream writer = new FileOutputStream("./images/" + multipartFile.getOriginalFilename())) {
                writer.write(multipartFile.getBytes());
            } catch (Exception e) {
                return "upload fail";
            }
        }
        return "upload success";
    }

    // ...
}
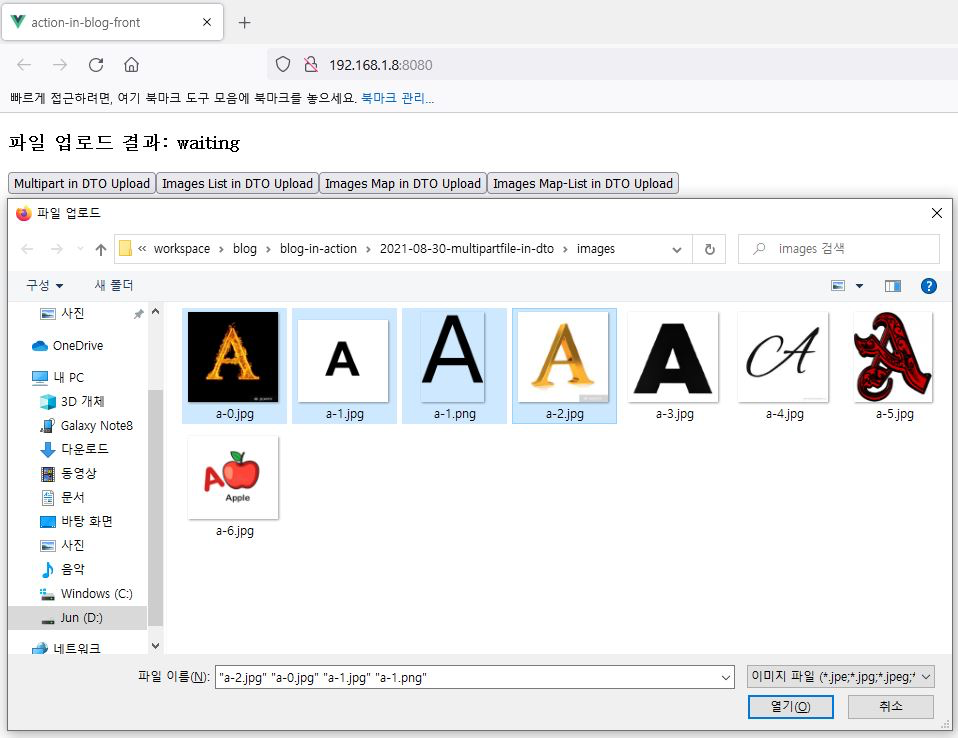
실제로 파일이 잘 업로드되는지 살펴보자. Images List in DTO Upload 버튼을 누른 후 이미지를 선택한다.
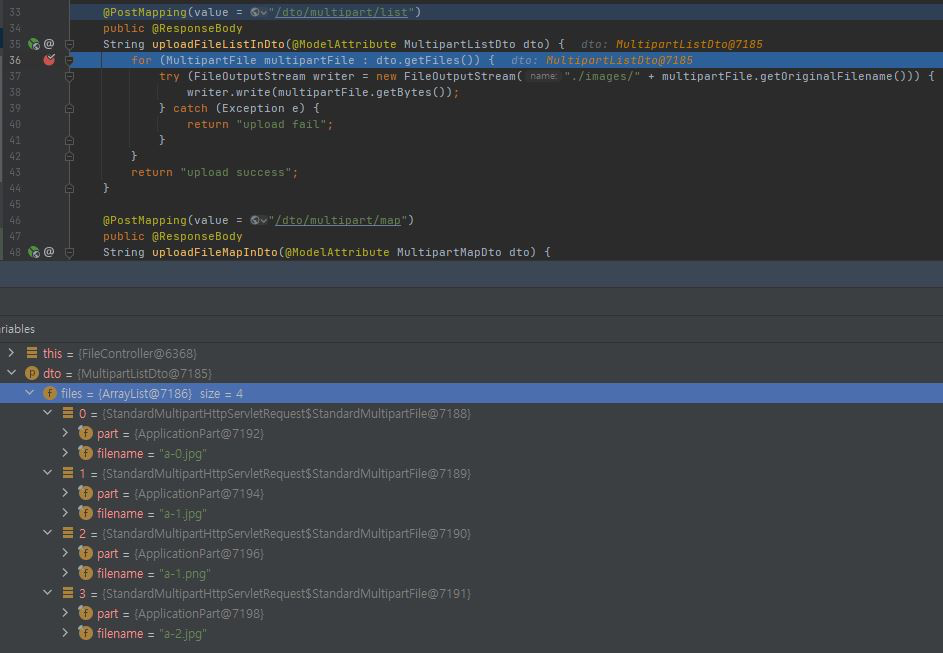
백엔드의 FileController 객체 메서드에 브레이킹 포인트를 만들어 메모리 상태를 살펴보자. 엔드포인트 파라미터인 MultipartListDto 객체의 files 멤버 변수에 프론트엔드에서 전달한 파일 정보 리스트가 담겨 있는 것을 볼 수 있다.
프론트엔드 FormData 객체의 append 함수는 이름처럼 추가된 항목 뒤에 새로 추가할 항목들을 붙이는 기능을 제공한다. 따라서 'files'라는 이름으로 파일을 계속 추가(append)하면 'files'라는 이름을 가진 리스트가 생성된다. 간단한 예시 코드를 살펴보자.
formData.append('name', true);
formData.append('name', 74);
formData.append('name', 'John');
formData.getAll('name'); // ["true", "74", "John"]
FormData 객체의 append 함수를 연달아 호출하면 해당 키에 값들이 추가된다. 동작을 이미지로 표현하면 아래와 같다.
5. MultipartFile 맵(Map) DTO 예제 코드
DTO 클래스 안에 파일을 N개 담아서 전달하는 예제 코드이다. 이번에는 N개의 파일을 리스트가 아닌 맵(Map)에 담아서 전달한다. FileUpload.vue 파일은 프론트엔드 프로젝트, 나머지 클래스 파일들은 백엔드 프로젝트의 예제 코드이다. FileUpload.vue 코드를 살펴보자.
- 파일을 선택할 수 있는 input element를 생성한다.
- 파일을 여러 개 선택할 수 있도록 multiple 속성을 true 값으로 지정한다.
- 파일 선택 후 수행되는
onchange이벤트에서 API 요청을 수행한다. - axios 요청 시 전달하는
FormData객체에'files[' + index + ']'라는 이름으로 선택한 이미지를 추가(append)하여 담는다. FormData객체를 API 요청에 함께 전달한다.
<template>
    <div>
        <h3>파일 업로드 결과: { { this.response === '' ? 'waiting' : this.response } }</h3>
        <div>
            <button @click="uploadFileInDto()">Multipart in DTO Upload</button>
            <button @click="uploadFileListInDto()">Images List in DTO Upload</button>
            <button @click="uploadFileMapInDto()">Images Map in DTO Upload</button>
            <button @click="uploadFileMapListInDto()">Images Map-List in DTO Upload</button>
        </div>
    </div>
</template>

<script>
import axios from 'axios';

export default {
    name: 'FileUpload',
    data() {
        return {
            response: ''
        }
    },
    methods: {
        responseCallback(response) {
            this.response = response.data;
        },
        errorCallback(error) {
            this.response = error.message;
        },
        getImageSelectElement(multiple) {
            let elem = document.createElement('input');
            elem.id = 'image';
            elem.type = 'file';
            elem.accept = 'image/*';
            elem.multiple = multiple;
            return elem;
        },
        uploadFileMapInDto() {
            var context = this;
            let elem = this.getImageSelectElement(true);
            elem.click();
            elem.onchange = function() {
                const formData = new FormData();
                for (var index = 0; index < this.files.length; index++) {
                    formData.append('files[' + index + ']', this.files[index]);
                }
                axios.post('http://localhost:8081/dto/multipart/map', formData, { headers: { 'Content-Type': 'multipart/form-data' } }).then(context.responseCallback).catch(context.errorCallback);
            }
        },

        // ...

    }
}
</script>
MultipartMapDto 클래스는 'files'라는 이름을 가진 MultipartFile 맵 멤버 필드를 가진다.
package blog.in.action.dto;

import java.util.Map;
import lombok.Getter;
import lombok.NoArgsConstructor;
import lombok.Setter;
import org.springframework.web.multipart.MultipartFile;

@Getter
@Setter
@NoArgsConstructor
public class MultipartMapDto {

    private Map<String, MultipartFile> files;
}
FileController 클래스 코드는 다음과 같다.
/dto/multipart/map경로에 대한 요청을 받아주는 메서드의 파라미터로 MultipartMapDto 객체를 받는다.
package blog.in.action.controller;

import blog.in.action.dto.MultipartDto;
import blog.in.action.dto.MultipartListDto;
import blog.in.action.dto.MultipartMapDto;
import blog.in.action.dto.MultipartMapListDto;
import java.io.FileOutputStream;
import java.util.List;
import java.util.Map;
import org.springframework.web.bind.annotation.CrossOrigin;
import org.springframework.web.bind.annotation.ModelAttribute;
import org.springframework.web.bind.annotation.PostMapping;
import org.springframework.web.bind.annotation.ResponseBody;
import org.springframework.web.bind.annotation.RestController;
import org.springframework.web.multipart.MultipartFile;

@CrossOrigin("*")
@RestController
public class FileController {

    @PostMapping(value = "/dto/multipart/map")
    public @ResponseBody
    String uploadFileMapInDto(@ModelAttribute MultipartMapDto dto) {
        Map<String, MultipartFile> files = dto.getFiles();
        for (String key : files.keySet()) {
            MultipartFile multipartFile = files.get(key);
            try (FileOutputStream writer = new FileOutputStream("./images/" + multipartFile.getOriginalFilename())) {
                writer.write(multipartFile.getBytes());
            } catch (Exception e) {
                return "upload fail";
            }
        }
        return "upload success";
    }

    // ...
}
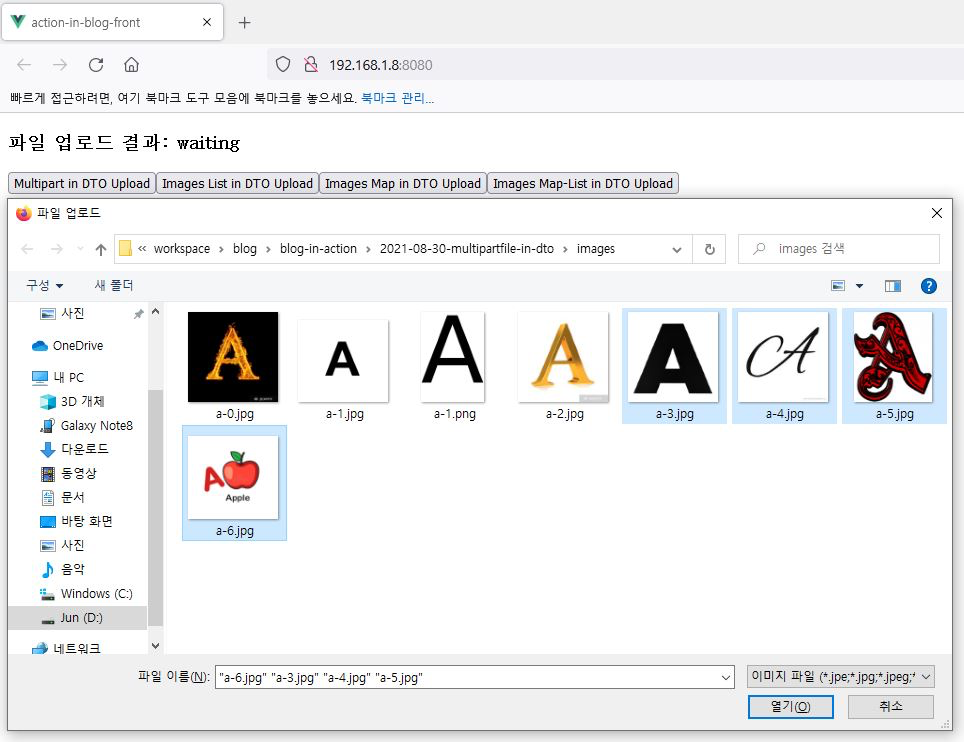
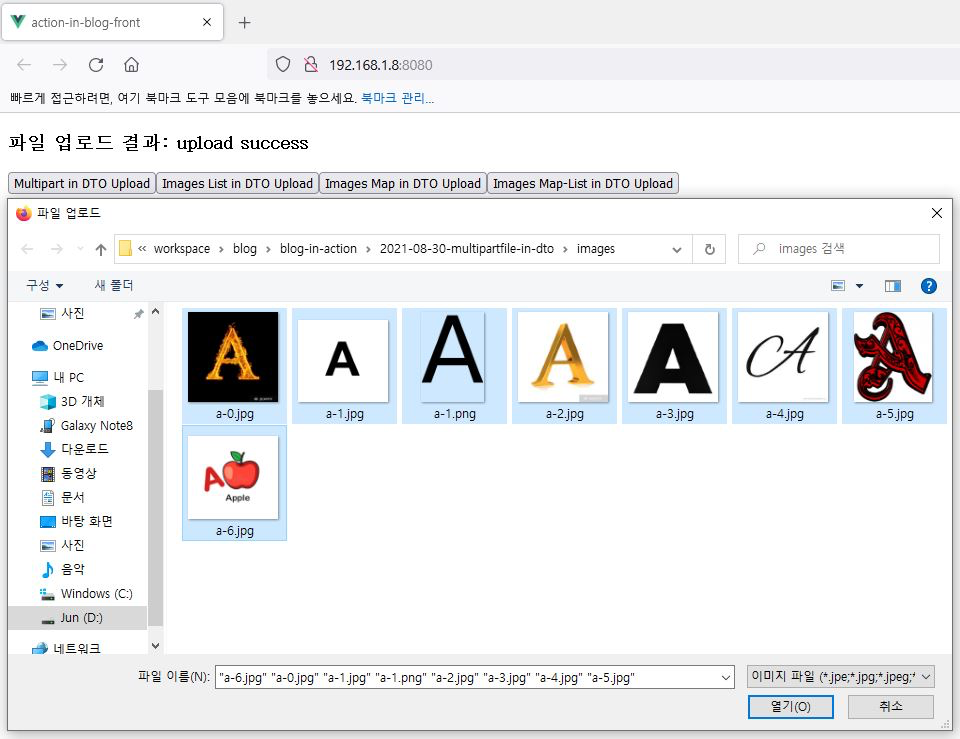
실제로 파일이 잘 업로드되는지 살펴보자. Images Map in DTO Upload 버튼을 누른 후 이미지를 선택한다.
마찬가지로 백엔드의 FileController 객체 메서드에 브레이킹 포인트를 만들어 메모리 상태를 살펴보자. 엔드포인트 파라미터인 MultipartMapDto 객체의 files 멤버 변수에 프론트엔드에서 전달한 파일 정보가 맵에 담겨 있는 것을 볼 수 있다.
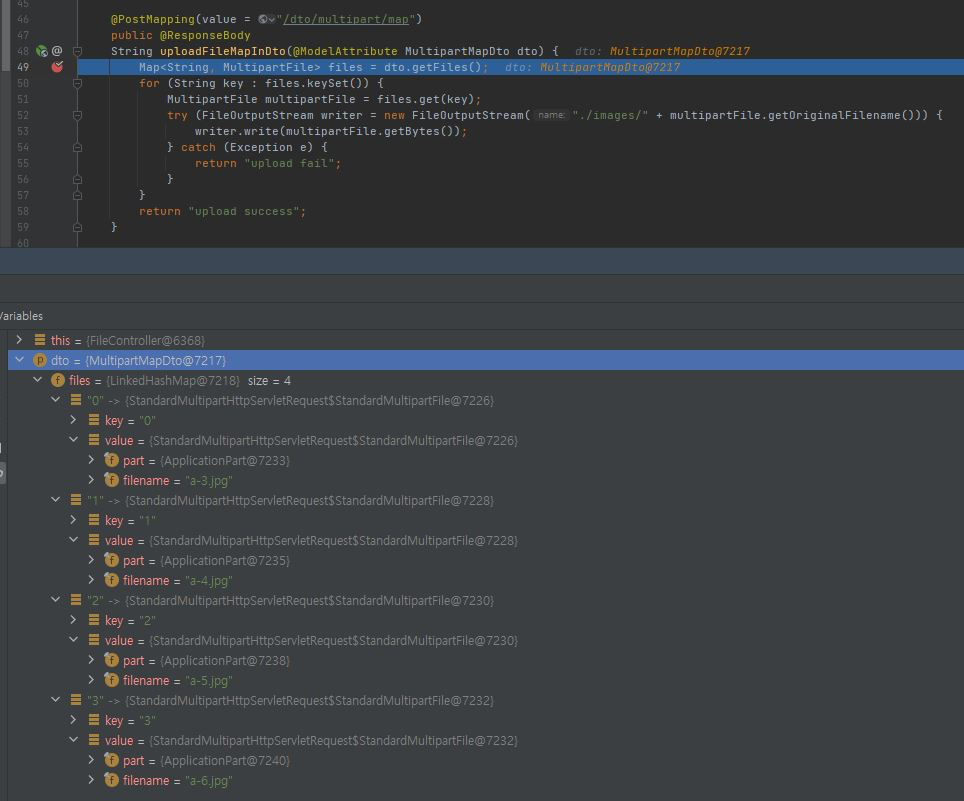
FormData 객체의 키(key)로 전달되는 값에 대괄호([])가 포함되는 경우 대괄호 안의 값을 Map의 키(key)로 인식한다. 'files[index]' 값은 files라는 멤버 변수의 키값으로 index를 사용한다는 의미이다.

6. MultipartFile 맵-리스트 DTO 예제 코드
DTO 클래스 안에 파일을 N개 담아서 전달하는 예제 코드이다. 이번에도 N개의 파일을 맵(Map)에 담아서 전달한다. 동일한 키를 가지는 경우 파일들은 리스트로 묶인다. FileUpload.vue 파일은 프론트엔드 프로젝트, 나머지 클래스 파일들은 백엔드 프로젝트의 예제 코드이다. 먼저 FileUpload.vue 코드를 살펴보자.
- 파일을 선택할 수 있는 input element를 생성한다.
- 파일을 여러 개 선택할 수 있도록 multiple 속성을 true 값으로 지정한다.
- 파일 선택 후 수행되는
onchange이벤트에서 API 요청을 수행한다. - axios 요청 시 전달하는
FormData객체에'files[' + (index % 3) + ']'라는 이름으로 선택한 이미지를 추가(append)하여 담는다. FormData객체를 API 요청에 함께 전달한다.
<template>
    <div>
        <h3>파일 업로드 결과: { { this.response === '' ? 'waiting' : this.response } }</h3>
        <div>
            <button @click="uploadFileInDto()">Multipart in DTO Upload</button>
            <button @click="uploadFileListInDto()">Images List in DTO Upload</button>
            <button @click="uploadFileMapInDto()">Images Map in DTO Upload</button>
            <button @click="uploadFileMapListInDto()">Images Map-List in DTO Upload</button>
        </div>
    </div>
</template>

<script>
import axios from 'axios';

export default {
    name: 'FileUpload',
    data() {
        return {
            response: ''
        }
    },
    methods: {
        responseCallback(response) {
            this.response = response.data;
        },
        errorCallback(error) {
            this.response = error.message;
        },
        getImageSelectElement(multiple) {
            let elem = document.createElement('input');
            elem.id = 'image';
            elem.type = 'file';
            elem.accept = 'image/*';
            elem.multiple = multiple;
            return elem;
        },

        // ...

        uploadFileMapListInDto() {
            var context = this;
            let elem = this.getImageSelectElement(true);
            elem.click();
            elem.onchange = function() {
                const formData = new FormData();
                for (var index = 0; index < this.files.length; index++) {
                    formData.append('files[' + (index % 3) + ']', this.files[index]);
                }
                axios.post('http://localhost:8081/dto/multipart/map/list', formData, { headers: { 'Content-Type': 'multipart/form-data' } }).then(context.responseCallback).catch(context.errorCallback);
            }
        }
    }
}
</script>
이 예제에서 사용하는 MultipartMapListDto 클래스는 'files'라는 이름을 가진 MultipartFile 맵(Map) 멤버를 가진다. 동일한 키를 가지는 경우 리스트(List)에 파일이 담기도록 맵의 Value 타입은 리스트 자료형을 가진다.
package blog.in.action.dto;

import java.util.List;
import java.util.Map;
import lombok.Getter;
import lombok.NoArgsConstructor;
import lombok.Setter;
import org.springframework.web.multipart.MultipartFile;

@Getter
@Setter
@NoArgsConstructor
public class MultipartMapListDto {

    private Map<String, List<MultipartFile>> files;
}
FileController 클래스를 살펴보자. /dto/multipart/map/list 경로에 대한 요청을 받아주는 메서드의 파라미터로 MultipartMapListDto 객체를 받는다.
package blog.in.action.controller;

import blog.in.action.dto.MultipartDto;
import blog.in.action.dto.MultipartListDto;
import blog.in.action.dto.MultipartMapDto;
import blog.in.action.dto.MultipartMapListDto;
import java.io.FileOutputStream;
import java.util.List;
import java.util.Map;
import org.springframework.web.bind.annotation.CrossOrigin;
import org.springframework.web.bind.annotation.ModelAttribute;
import org.springframework.web.bind.annotation.PostMapping;
import org.springframework.web.bind.annotation.ResponseBody;
import org.springframework.web.bind.annotation.RestController;
import org.springframework.web.multipart.MultipartFile;

@CrossOrigin("*")
@RestController
public class FileController {

    // ...

    @PostMapping(value = "/dto/multipart/map/list")
    public @ResponseBody
    String uploadFileMapListInDto(@ModelAttribute MultipartMapListDto dto) {
        Map<String, List<MultipartFile>> files = dto.getFiles();
        for (String key : files.keySet()) {
            List<MultipartFile> multipartFiles = files.get(key);
            for (MultipartFile multipartFile : multipartFiles) {
                try (FileOutputStream writer = new FileOutputStream("./images/" + multipartFile.getOriginalFilename())) {
                    writer.write(multipartFile.getBytes());
                } catch (Exception e) {
                    return "upload fail";
                }
            }
        }
        return "upload success";
    }
}
실제로 파일이 잘 업로드되는지 살펴보자. Images Map-List in DTO Upload 버튼을 누른 후 이미지를 선택한다.
마찬가지로 백엔드의 FileController 객체 메서드에 브레이킹 포인트를 만들어 메모리 상태를 살펴보자. 엔드포인트 파라미터인 MultipartMapListDto 객체의 files 멤버 변수에 프론트엔드에서 전달한 파일 정보가 맵에 담겨 있는 것을 볼 수 있다.
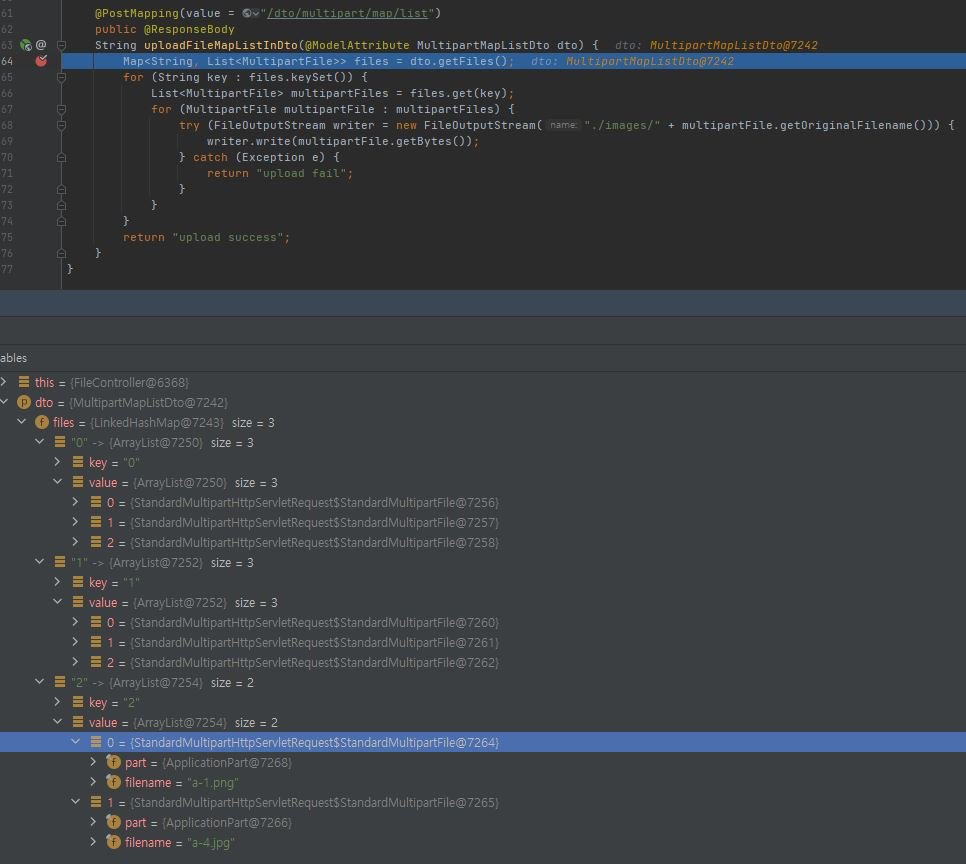
FormData 객체의 키(key)로 전달되는 값에 대괄호([])가 포함되는 경우 대괄호 안의 값을 Map의 키(key)로 인식한다. 'files[' + (index % 3) + ']' 값은 files라는 멤버 변수의 키값으로 (index % 3) 값을 사용한다는 의미이다. 중첩되는 키가 존재하는 경우 맵의 Value 위치에는 리스트로 데이터가 담긴다.

댓글남기기