


AWS 시크릿 매니저(secrets manager)와 스프링 부트 애플리케이션 연결
1. AWS Secrets Manager
데이터베이스 인증서, API 키, 토큰 등 IT 리소스(resource) 접근에 필요한 보안 암호를 보호, 관리하는 AWS 컴포넌트이다.
- 보안 암호를 대규모로 관리, 교체, 검색할 수 있다.
- 보안 암호의 수명 주기를 관리한다.
- 다른 AWS 서비스와 통합하여 모니터링을 자동화한다.
- 내부 보안 또는 규정 요건을 충족하지 않는 암호를 빠르게 찾아낼 수 있다.
- 보안 암호 복제 기능으로 여러 지역의 애플리케이션과 재해 복구 상황을 지원한다.
- 애플리케이션에서 필요한 설정 값들을 프로파일(profile) 단위로 관리할 수 있다. 서비스가 배포되는 환경 별로 다른 설정 값을 사용할 수 있다.
2. AWS Secrets Manager Config in Spring Cloud
스프링 클라우드(spring cloud)는 AWS 시크릿 매니저를 쉽게 사용할 수 있도록 의존성(dependency)를 제공한다.
- 아래 의존성들을 추가한다.
- spring-cloud-starter-bootstrap
- spring-cloud-starter-aws-secrets-manager-config
- 해당 의존성들이 추가되면 애플리케이션이 실행되는 시점에
Secrets Manager에서 필요한 설정들을 읽는다.- bootstrap.yml 파일에 별도 설정이 추가되어야 한다.
    <dependency>
        <groupId>org.springframework.cloud</groupId>
        <artifactId>spring-cloud-starter-bootstrap</artifactId>
        <version>4.0.3</version>
    </dependency>
    <dependency>
        <groupId>io.awspring.cloud</groupId>
        <artifactId>spring-cloud-starter-aws-secrets-manager-config</artifactId>
        <version>2.4.4</version>
    </dependency>
3. Create AWS Secret Manager
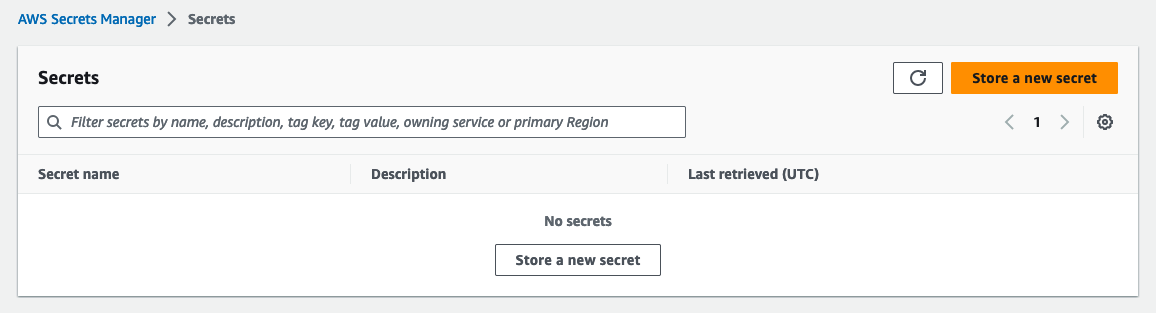
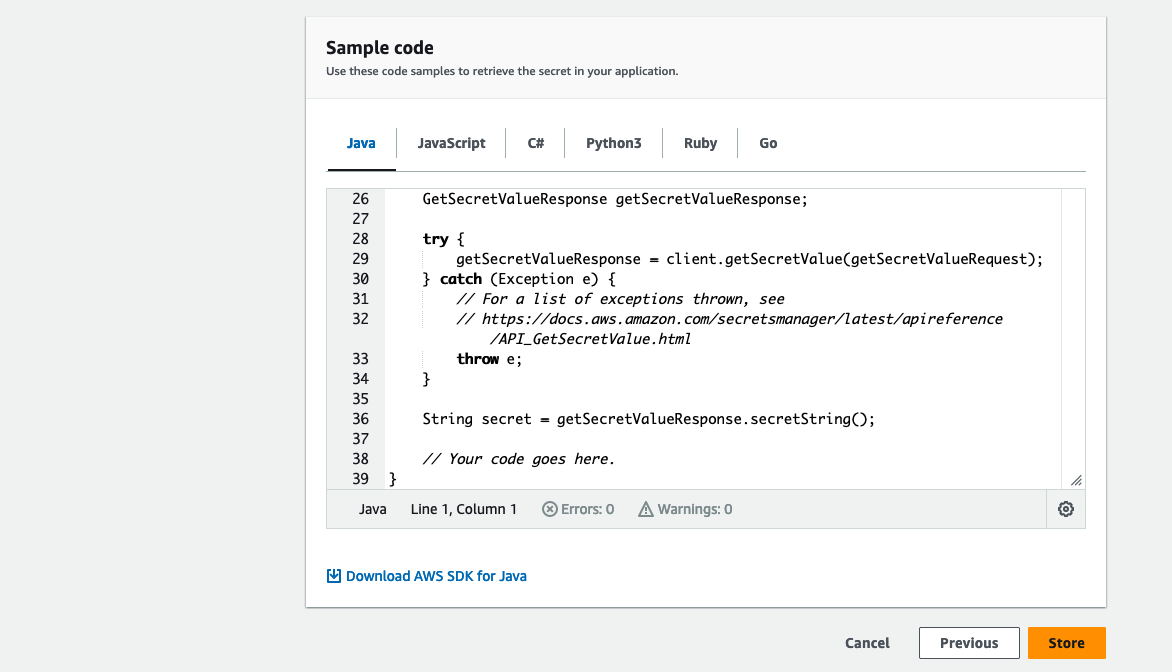
AWS Secrets Manager에 간단한 프로퍼티를 설정하고 애플리케이션에서 주입 받는 예제를 살펴보자. 먼저 AWS 콘솔의 Secrets Manager에서 다음과 같은 과정을 통해 설정들을 추가한다.
Store a new secret버튼을 클릭한다.
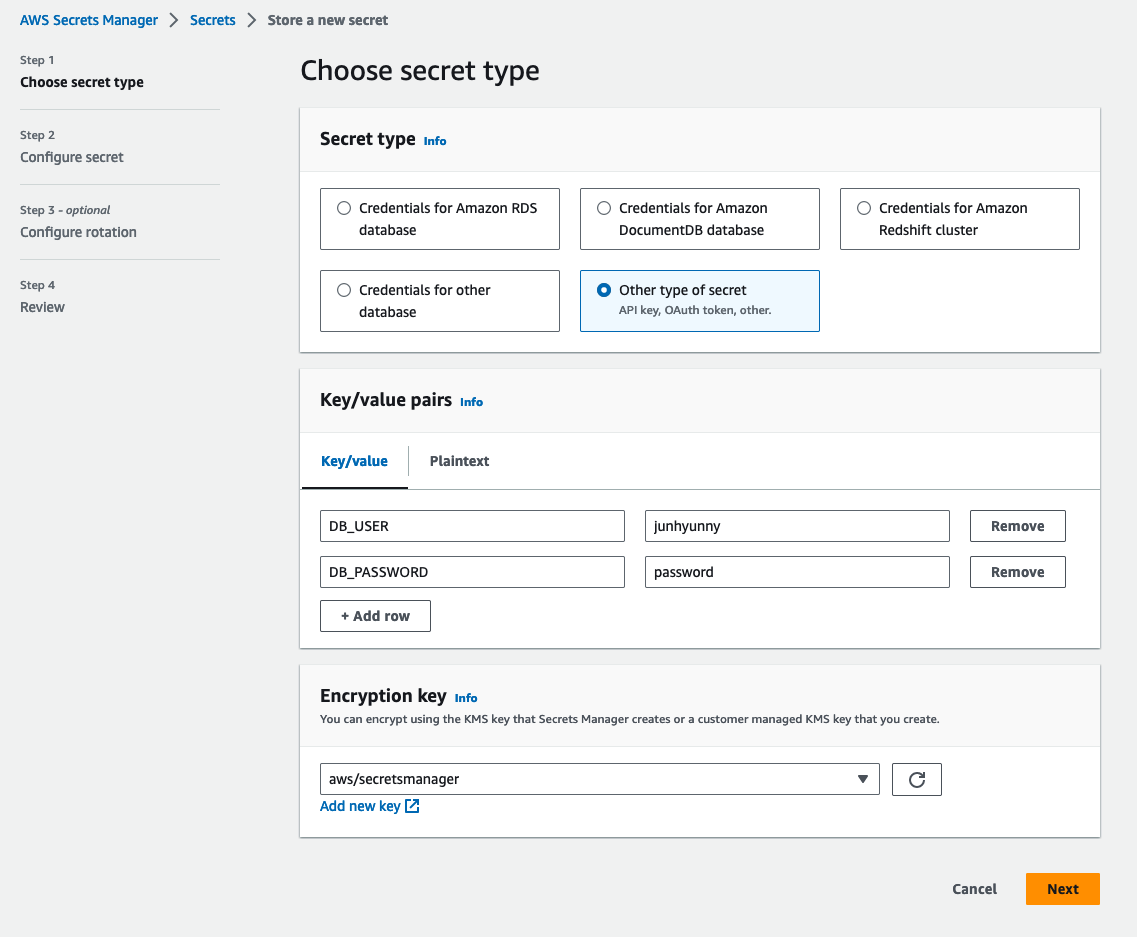
다음으로 환경 변수로 주입할 시크릿 값들을 생성한다.
Other type of secret을 선택 후 필요한 설정을 키/값 형태로 입력한다.
설정 이름을 작성한다.
- bootstrap.yml 파일에서 별도로 접두어(prefix)를 설정하지 않으면
/secret/가 자동으로 추가된다. - 이름을
/secret/action-in-blog으로 지정하였다.
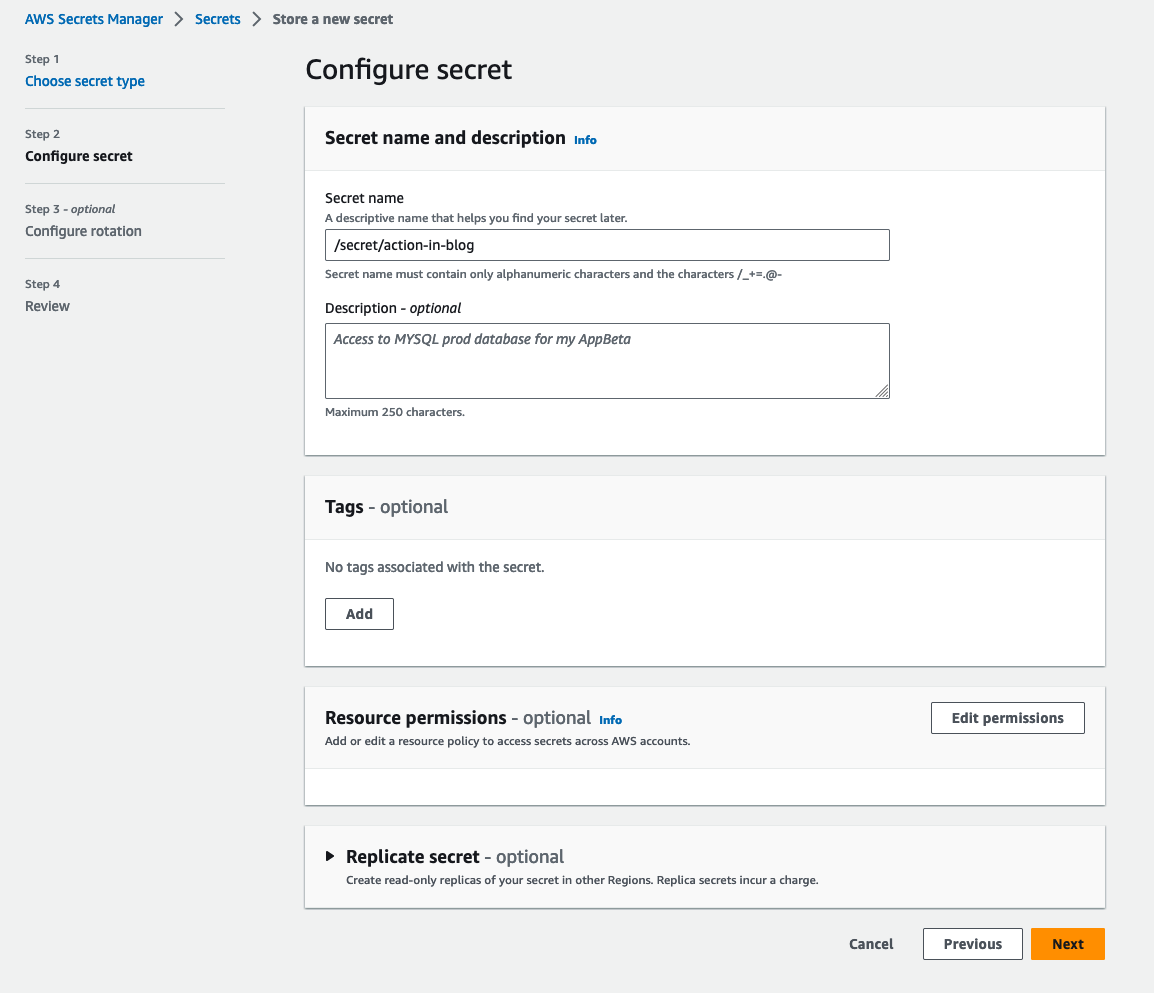
해당 화면에서 추가 설정 없이 다음(next) 버튼을 선택한다.
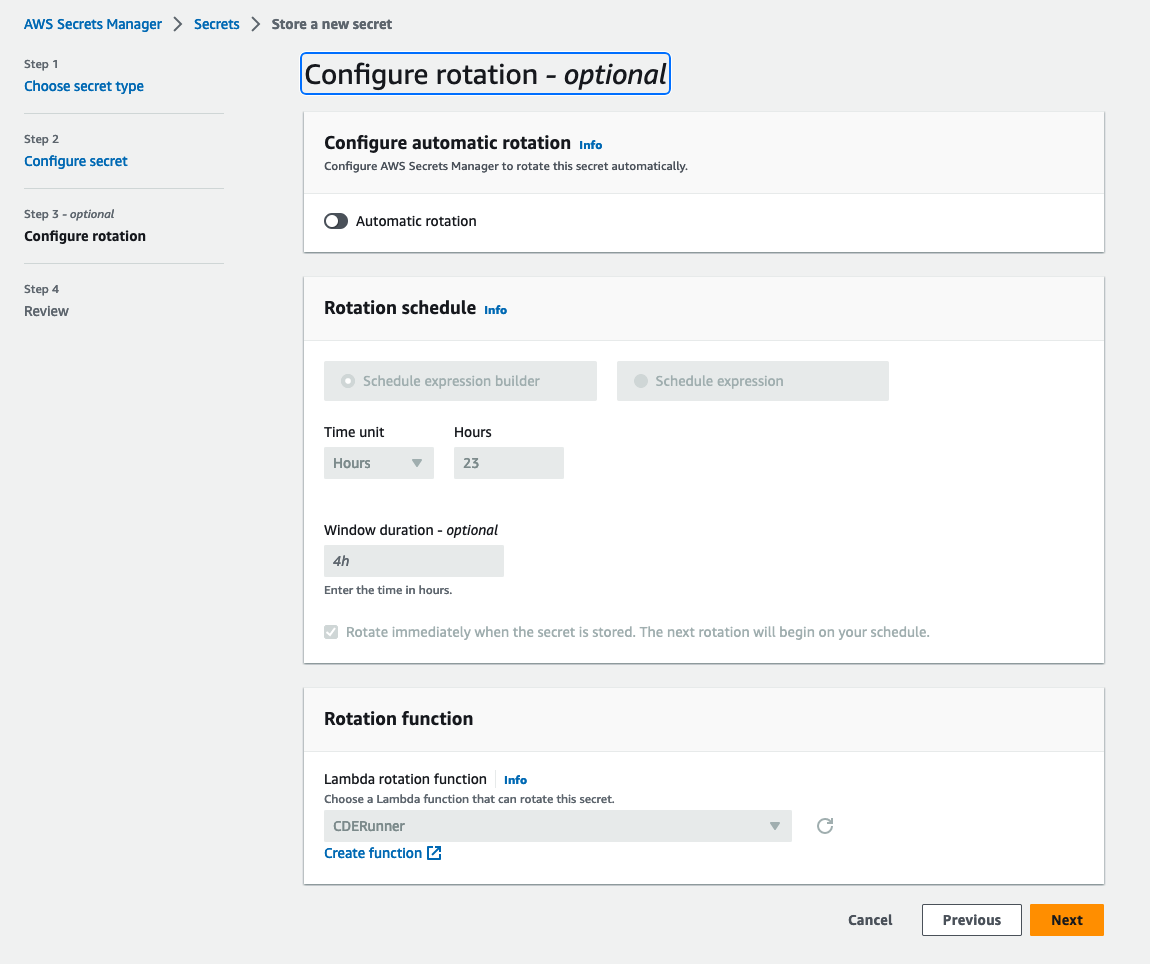
해당 화면에서 추가 설정 없이 저장(store) 버튼을 선택한다.
4. Configuration in Spring Boot
pom.xml 파일에 다음과 같이 의존성들을 추가한다.
<?xml version="1.0" encoding="UTF-8"?>
<project xmlns:xsi="http://www.w3.org/2001/XMLSchema-instance" xmlns="http://maven.apache.org/POM/4.0.0"
         xsi:schemaLocation="http://maven.apache.org/POM/4.0.0 https://maven.apache.org/xsd/maven-4.0.0.xsd">
    <modelVersion>4.0.0</modelVersion>
    <parent>
        <groupId>org.springframework.boot</groupId>
        <artifactId>spring-boot-starter-parent</artifactId>
        <version>3.1.1</version>
        <relativePath/> <!-- lookup parent from repository -->
    </parent>
    <groupId>action.in.blog</groupId>
    <artifactId>action-in-blog</artifactId>
    <version>0.0.1-SNAPSHOT</version>
    <name>action-in-blog</name>
    <description>action-in-blog</description>
    <properties>
        <java.version>17</java.version>
    </properties>
    <dependencies>
        <dependency>
            <groupId>org.springframework.boot</groupId>
            <artifactId>spring-boot-starter-web</artifactId>
        </dependency>
        <dependency>
            <groupId>org.projectlombok</groupId>
            <artifactId>lombok</artifactId>
            <optional>true</optional>
        </dependency>
        <dependency>
            <groupId>org.springframework.boot</groupId>
            <artifactId>spring-boot-starter-test</artifactId>
            <scope>test</scope>
        </dependency>
        <dependency>
            <groupId>org.springframework.cloud</groupId>
            <artifactId>spring-cloud-starter-bootstrap</artifactId>
            <version>4.0.3</version>
        </dependency>
        <dependency>
            <groupId>io.awspring.cloud</groupId>
            <artifactId>spring-cloud-starter-aws-secrets-manager-config</artifactId>
            <version>2.4.4</version>
        </dependency>
    </dependencies>

    <build>
        <plugins>
            <plugin>
                <groupId>org.springframework.boot</groupId>
                <artifactId>spring-boot-maven-plugin</artifactId>
                <configuration>
                    <excludes>
                        <exclude>
                            <groupId>org.projectlombok</groupId>
                            <artifactId>lombok</artifactId>
                        </exclude>
                    </excludes>
                </configuration>
            </plugin>
        </plugins>
    </build>
</project>
bootstrap YAML 파일에 시크릿 매니저를 통해 필요한 설정을 주입 받기 위해 다음과 같은 설정을 추가한다.
- Secrets 이름
- 설정을 읽을 때
/secret/접두어가 자동으로 추가된다.
- 설정을 읽을 때
- Secrets 적용 지역(region)
aws:
  secretsmanager:
    name: action-in-blog
cloud:
  aws:
    region:
      static: us-east-1
시크릿 매니저에 설정한 값들을 주입 받기 위해 application YAML 파일을 작성한다.
- 환경 변수를 통해 시크릿 매니저에 설정한 값들을 주입받는다.
- DB_USER - 데이터베이스 사용자
- DB_PASSWORD - 데이터베이스 비밀번호
- 시크릿 매니저는 프로파일 기능을 지원하며 이를 테스트하기 위해 프로파일을
dev로 활성화시킨다.
spring:
  profiles:
    active: dev
database:
  user: ${DB_USER}
  password: ${DB_PASSWORD}
애플리케이션이 실행 후 출력되는 로그를 통해 주입된 값들을 확인한다.
package action.in.blog;

import jakarta.annotation.PostConstruct;
import lombok.extern.slf4j.Slf4j;
import org.springframework.beans.factory.annotation.Value;
import org.springframework.boot.SpringApplication;
import org.springframework.boot.autoconfigure.SpringBootApplication;

import java.util.Map;

@Slf4j
@SpringBootApplication
public class ActionInBlogApplication {

    @Value("${database.user}")
    private String databaseUser;

    @Value("${database.password}")
    private String databasePassword;

    public static void main(String[] args) {
        SpringApplication.run(ActionInBlogApplication.class, args);
    }

    @PostConstruct
    private void postConstructor() {
        log.info("{}", Map.of(
                        "databaseUser", databaseUser,
                        "databasePassword", databasePassword
                )
        );
    }
}
다음과 같은 규칙을 따른다.
- 프로파일 설정은 시크릿 뒤에
_구분자로 추가된다. - 구분자는 bootstrap.yml 설정을 통해 변경할 수 있다.
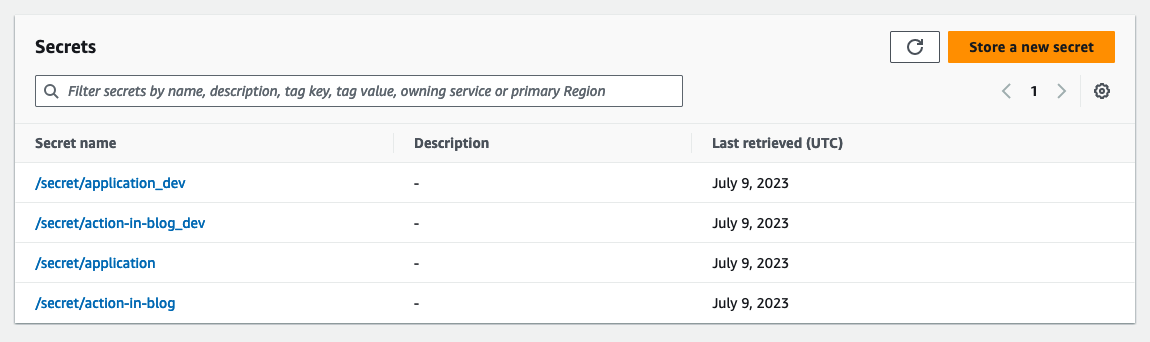
프로파일이 적용된 스프링 애플리케이션을 실행할 때 프로파일이 정상적으로 동작하는지 확인하기 위해 다음과 같이 프로파일 별로 설정을 만들었다.
- /secret/action-in-blog_dev
- DB_USER - junhyunny-dev
- DB_PASSWORD - password-dev
- /secret/action-in-blog
- DB_USER - junhyunny
- DB_PASSWORD - password
- /secret/application_dev
- DB_USER - root-dev
- DB_PASSWORD - mysql123-dev
- /secret/application
- DB_USER - root
- DB_PASSWORD - mysql123
로컬 컴퓨터에서 애플리케이션을 실행하면 다음과 같은 에러를 만나게 된다. 해당 에러는 로컬 컴퓨터가 시크릿 매니저에 접근할 수 있는 권한이 없기 때문에 발생한다.
2023-07-09T23:32:41.702+09:00  INFO 20762 --- [           main] i.a.c.s.AwsSecretsManagerPropertySources : Loading secrets from AWS Secret Manager secret with name: /secret/action-in-blog, optional: false
2023-07-09T23:32:41.716+09:00 ERROR 20762 --- [           main] o.s.boot.SpringApplication               : Application run failed

io.awspring.cloud.secretsmanager.AwsSecretsManagerPropertySources$AwsSecretsManagerPropertySourceNotFoundException: com.amazonaws.services.secretsmanager.model.AWSSecretsManagerException: The security token included in the request is expired (Service: AWSSecretsManager; Status Code: 400; Error Code: ExpiredTokenException; Request ID: fc9389d1-fc38-45bf-97e0-e368ba679a31; Proxy: null)
    at io.awspring.cloud.secretsmanager.AwsSecretsManagerPropertySources.createPropertySource(AwsSecretsManagerPropertySources.java:93) ~[spring-cloud-aws-secrets-manager-config-2.4.4.jar:2.4.4]
    at io.awspring.cloud.secretsmanager.AwsSecretsManagerPropertySourceLocator.locate(AwsSecretsManagerPropertySourceLocator.java:94) ~[spring-cloud-aws-secrets-manager-config-2.4.4.jar:2.4.4]
    at org.springframework.cloud.bootstrap.config.PropertySourceLocator.locateCollection(PropertySourceLocator.java:50) ~[spring-cloud-context-4.0.3.jar:4.0.3]
    at org.springframework.cloud.bootstrap.config.PropertySourceLocator.locateCollection(PropertySourceLocator.java:46) ~[spring-cloud-context-4.0.3.jar:4.0.3]
AWS 콘솔에서 IAM(Identity and Access Management)를 통해 발급받은 ID, Secret을 로컬 컴퓨터에 설정한다. 해당 작업은 AWS CLI(command line interface) 설치가 필요하다.
$ aws configure
AWS Access Key ID [****************S5FG]: ${YOUR_AWS_CLIENT_ID}
AWS Secret Access Key [****************KtFb]: {YOUR_AWS_CLIENT_SECRET}
Default region name [us-east-1]:
Default output format [None]:

$ aws configure set aws_session_token ${YOUR_AWS_SESSION_TOKEN}
AWS 시크릿이 설정되면 애플리케이션이 정상적으로 실행된다. 주요하게 살펴볼 로그는 다음과 같다.
- 시크릿 매니저에 준비한 4개의 설정이 로딩된다.
- 활성화 된 프로파일은
dev이므로/secret/action-in-blog_dev이 사용된다.
: Located property source: [BootstrapPropertySource {name='bootstrapProperties-/secret/action-in-blog_dev'}, BootstrapPropertySource {name='bootstrapProperties-/secret/action-in-blog'}, BootstrapPropertySource {name='bootstrapProperties-/secret/application_dev'}, BootstrapPropertySource {name='bootstrapProperties-/secret/application'}]
: The following 1 profile is active: "dev"
: Loading secrets from AWS Secret Manager secret with name: /secret/action-in-blog_dev, optional: false
dev 프로파일에 설정된 데이터베이스 설정 값이 정상적으로 로그에 출력된다.
: {databasePassword=password-dev, databaseUser=junhyunny-dev}
TEST CODE REPOSITORY
REFERENCE
- https://aws.amazon.com/ko/secrets-manager/features/
- https://docs.aws.amazon.com/ko_kr/secretsmanager/latest/userguide/intro.html
- https://www.baeldung.com/spring-boot-integrate-aws-secrets-manager
- https://devocean.sk.com/blog/techBoardDetail.do?ID=164482
- [Spring Boot] AWS Secret Manager를 이용하여 프로퍼티를 관리하자
댓글남기기