리눅스 방화벽 열기(open firewall of linux)
RECOMMEND POSTS BEFORE THIS
0. 들어가면서
이전 글에서 방화벽에 대한 기본적인 개념을 다뤘다. 이번 글에선 방화벽과 관련된 몇 가지 실습을 진행한다.
- 방화벽 OPEN/CLOSE 확인
- 방화벽 열기
1. Context of Practice
다음과 같은 실습 환경을 구축하였다.
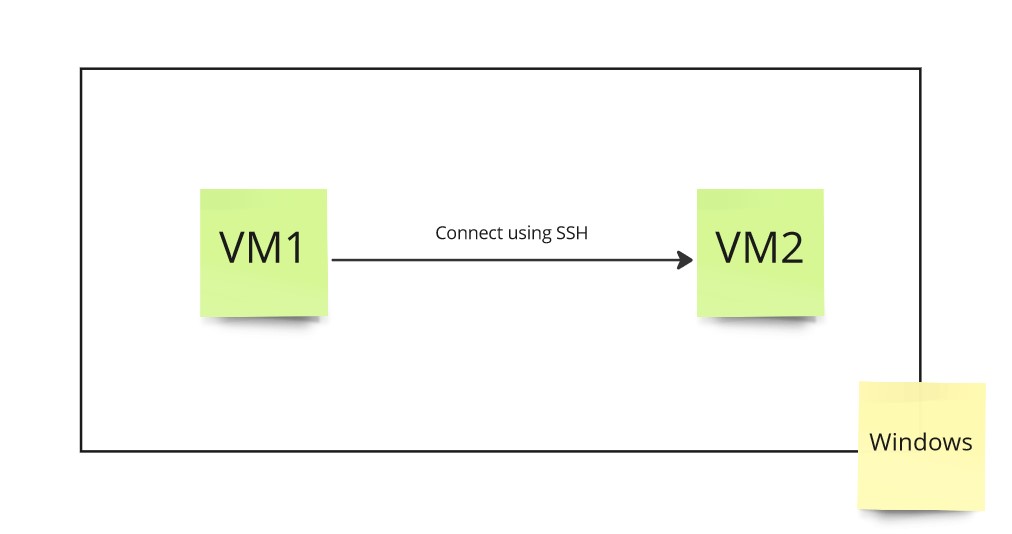
- Windows 운영체제를 사용하는 호스트(host) PC 위에 가상 머신(virtual machine) 두 대를 실행시킨다.
- 운영체제 - Ubuntu 22.04.1
VM1IP - 192.168.78.130VM2IP - 192.168.78.132
VM1에서VM2로 SSH 접근을 수행한다.VM1에서VM2의 “22” 포트가 열렸는지 확인한다.VM2에서 “22” 포트에 대한 방화벽을 열어준다.VM1에서 SSH 접근을 수행한다.

2. Practice
가상 머신이 2개이므로 각 명령어를 어느 머신에서 실행했는지 확인하면서 진행한다.
2.1. Check Open/Close Firewall on VM1
VM2에 방화벽이 열려있는지 먼저 확인한다. 방화벽이 열렸는지 확인하는 명령어는 VM1에서 실행한다.
2.1.1. Using telnet
telnet이 설치되어 있는 경우 다음 명령어를 통해 확인이 가능하다. 연결이 성공하면 다음과 같은 메시지를 볼 수 있다.
$ telnet 192.168.78.132 22
Trying 192.168.78.132...
Connected to 192.168.78.132.
Escape character is '^]'.
SSH-2.0-OpenSSH_8.9p1 Ubuntu-3ubuntu0.1

Invalid SSH identification string.
Connection closed by foreign host.
반대로 연결이 실패하면 다음과 같은 메시지를 만난다.
$ telnet 192.168.78.132 22
Trying 192.168.78.132...
telnet: Unable to connect to remote host: Connection refused
2.1.2. Using built-in function of bash
telnet이 없는 경우 bash에서 제공하는 기능을 사용한다. 폐쇄망의 경우 telnet 설치가 자유롭지 못하기 때문에 이 방법을 사용할 수 있다. 연결이 성공하면 아무런 반응이 없다.
$ echo > /dev/tcp/192.168.78.132/22
연결이 실패하면 에러 메시지를 만난다.
$ echo > /dev/tcp/192.168.78.132/22
bash: connect: Connection refused
bash: /dev/tcp/192.168.78.132/22: Connection refused
2.1.3. Using cURL
보통 cURL 명령어는 간단한 HTTP 요청을 수행할 때 사용하지만, telnet 스키마도 지원하므로 이를 사용할 수 있다. 연결이 성공하면 다음과 같은 메시지를 만난다.
$ curl telnet://192.168.78.132:22
SSH-2.0-OpenSSH_8.9p1 Ubuntu-3ubuntu0.1
연결이 실패하면 다음과 같은 메시지를 만난다.
$ curl telnet://192.168.78.132:22
curl: (7) Failed to connect to 192.168.78.132 port 22 after 1 ms: Connection refused
2.2. Open Firewall on VM2
VM2에서 VM1이 22번 포트로 접근할 수 있도록 방화벽을 열어주는 작업을 수행한다. 먼저 외부에서 SSH 접근이 가능하도록 VM2에 SSH 서버를 설치한다.
$ sudo apt-get update
Hit:1 http://kr.archive.ubuntu.com/ubuntu jammy InRelease
Hit:2 http://kr.archive.ubuntu.com/ubuntu jammy-updates InRelease
Hit:3 http://kr.archive.ubuntu.com/ubuntu jammy-backports InRelease
Hit:4 http://security.ubuntu.com/ubuntu jammy-security InRelease
Reading package lists... Done

$ sudo apt install openssh-server
Reading package lists... Done
Building dependency tree... Done
Reading state information... Done
The following packages were automatically installed and are no longer required:
  libflashrom1 libftdi1-2
Use 'sudo apt autoremove' to remove them.
The following additional packages will be installed:
  ncurses-term openssh-sftp-server ssh-import-id
Suggested packages:
  molly-guard monkeysphere ssh-askpass
The following NEW packages will be installed:
  ncurses-term openssh-server openssh-sftp-server ssh-import-id
0 upgraded, 4 newly installed, 0 to remove and 4 not upgraded.
Need to get 750 kB of archives.
After this operation, 6,046 kB of additional disk space will be used.
Do you want to continue? [Y/n] y
...
VM2에서 방화벽을 활성화한다. 우분투 최신 버전에서는 UFW(Uncomplicated Firewall) 명령어를 통해 방화벽을 실행한다.
- 처음엔 방화벽이 비활성화되어 있다.
sudo ufw enable명령어를 통해 방화벽을 활성화시킨다.iptables명령어를 통해 등록된 INPUT, OUTPUT 정책을 확인한다.
$ sudo ufw status
Status: inactive

$ sudo ufw enable
Firewall is active and enabled on system startup

$ sudo ufw status
Status: active

$ sudo iptables -L INPUT --line-numbers
Chain INPUT (policy DROP)
num  target     prot opt source               destination
1    ufw-before-logging-input  all  --  anywhere             anywhere
2    ufw-before-input  all  --  anywhere             anywhere
3    ufw-after-input  all  --  anywhere             anywhere
4    ufw-after-logging-input  all  --  anywhere             anywhere
5    ufw-reject-input  all  --  anywhere             anywhere
6    ufw-track-input  all  --  anywhere             anywhere

$ sudo iptables -L OUTPUT --line-numbers
Chain OUTPUT (policy ACCEPT)
num  target     prot opt source               destination
1    ufw-before-logging-output  all  --  anywhere             anywhere
2    ufw-before-output  all  --  anywhere             anywhere
3    ufw-after-output  all  --  anywhere             anywhere
4    ufw-after-logging-output  all  --  anywhere             anywhere
5    ufw-reject-output  all  --  anywhere             anywhere
6    ufw-track-output  all  --  anywhere             anywhere
이 글에선 리눅스에서 기본으로 제공하는 iptables 명령어를 사용했다. iptables를 사용하는 경우 송신, 수신에 따라 체인(chain)을 지정해줘야 한다.
- INPUT - 외부에서 서버로 들어오는 연결에 대한 필터
- OUTPUT - 서버에서 외부로 나가는 연결에 대한 필터
- FORWARD - 외부에서 들어온 연결이 다시 외부로 향하는 필터
다음과 같은 옵션을 사용하여 방화벽을 열었다.
-A [CHAIN]- 새로운 체인을 등록한다.-p [PROTOCOL]- 어떤 프로토콜(protocol)을 사용하는지 지정한다.-s [IP/SUBNET MASK]- 출발지의 IP 대역을 지정한다.-d [IP/SUBNET MASK]- 도착지의 IP 대역을 지정한다.--sport [PORT NUMBER]- 출발지의 포트 번호를 지정한다.--dport [PORT NUMBER]- 도착지의 포트 번호를 지정한다.-j ACCEPT- 허용-j DROP- 차단
먼저, 외부에서 내부로 접근하는 방화벽을 열어준다.
VM2입장에서 INPUT 이다.- 프로토콜은 TCP를 사용한다.
- 출발지가 192.168.78.X 대역의 IP를 사용하는 호스트(host)만 허용한다.
- 도착지 포트 번호는 SSH(22) 이다.
- 해당 정책을 만족하는 트래픽(traffic)은 허용한다.
$ sudo iptables -A INPUT -p tcp -s 192.168.78.0/24 --dport 22 -j ACCEPT

$ sudo iptables -L INPUT --line-numbers
Chain INPUT (policy DROP)
num  target     prot opt source               destination
1    ufw-before-logging-input  all  --  anywhere             anywhere
2    ufw-before-input  all  --  anywhere             anywhere
3    ufw-after-input  all  --  anywhere             anywhere
4    ufw-after-logging-input  all  --  anywhere             anywhere
5    ufw-reject-input  all  --  anywhere             anywhere
6    ufw-track-input  all  --  anywhere             anywhere
7    ACCEPT     tcp  --  192.168.78.0/24      anywhere             tcp dpt:ssh
다음은 내부에서 외부로 나가는 연결을 제어한다. 내부에서 외부로 나가는 방화벽 정책은 별도로 없더라도 SSH 연결이 가능하다. 그렇지만 연습 삼아 내부에서 외부로 나가는 방화벽을 열어줬다.
VM2입장에서 OUTPUT 이다.- 프로토콜은 TCP를 사용한다.
- 도착지가 192.168.78.X 대역의 IP를 사용하는 호스트(host)만 허용한다.
- 출발지 포트 번호는 SSH(22) 이다.
- 해당 정책을 만족하는 트래픽(traffic)은 허용한다.
$ sudo iptables -A OUTPUT -p tcp -d 192.168.78.0/24 --sport 22 -j ACCEPT

$ sudo iptables -L OUTPUT --line-numbers
Chain OUTPUT (policy ACCEPT)
num  target     prot opt source               destination
1    ufw-before-logging-output  all  --  anywhere             anywhere
2    ufw-before-output  all  --  anywhere             anywhere
3    ufw-after-output  all  --  anywhere             anywhere
4    ufw-after-logging-output  all  --  anywhere             anywhere
5    ufw-reject-output  all  --  anywhere             anywhere
6    ufw-track-output  all  --  anywhere             anywhere
7    ACCEPT     tcp  --  anywhere             192.168.78.0/24      tcp spt:ssh
아래 명령어를 통해 설정한 정책을 적용한다.
$ sudo ufw reload
Firewall reloaded
두 개의 가상 머신을 실행 후 방화벽이 열려 있는 상태인지 SSH 연결을 통해 확인한다.

CLOSING
우분투에서 작업할 때 iptables를 서비스로 재실행하는 경우 에러가 발생한다.
$ sudo service iptables restart
Failed to restart iptables.service: Unit iptables.service not found.
ufw enable 명령어를 통해 쉽게 방화벽을 실행할 수 있기 때문에 별도 서비스로 제공하지 않는 것 같다. 추가적으로 ufw 명령어를 사용하면 직관적이고 단순한 방식으로 방화벽 규칙을 설정할 수 있다. 다만 세밀하게 방화벽 정책을 세우기에는 iptables 명령어가 더 적절한 것 같은 느낌을 받는다.
$ sudo ufw allow ssh
Rule added
Rule added (v6)

$ sudo ufw status
Status: active

To                         Action      From
--                         ------      ----
22/tcp                     ALLOW       Anywhere
22/tcp (v6)                ALLOW       Anywhere (v6)

댓글남기기